On IIS 7.0, found on Windows Server 2008, Microsoft has added several more layers of management, thereby making it harder to find the correct settings to enable CGI. Below is a step-by-step procedure for starting from a clean installation of Windows 2008.
 Start Server Roles from Administrative Tools.
 Add Web Server (click "yes" to add required serviced)
- Under Web Server options, choose the defaults. Also add:
- Application Development: CGI
- Security: Basic Authentication
- FTP Publishing Services: FTP Server, FTP Management console
- Install. Now, there will be an \inetpub folder with subfolders ftproot and wwwroot
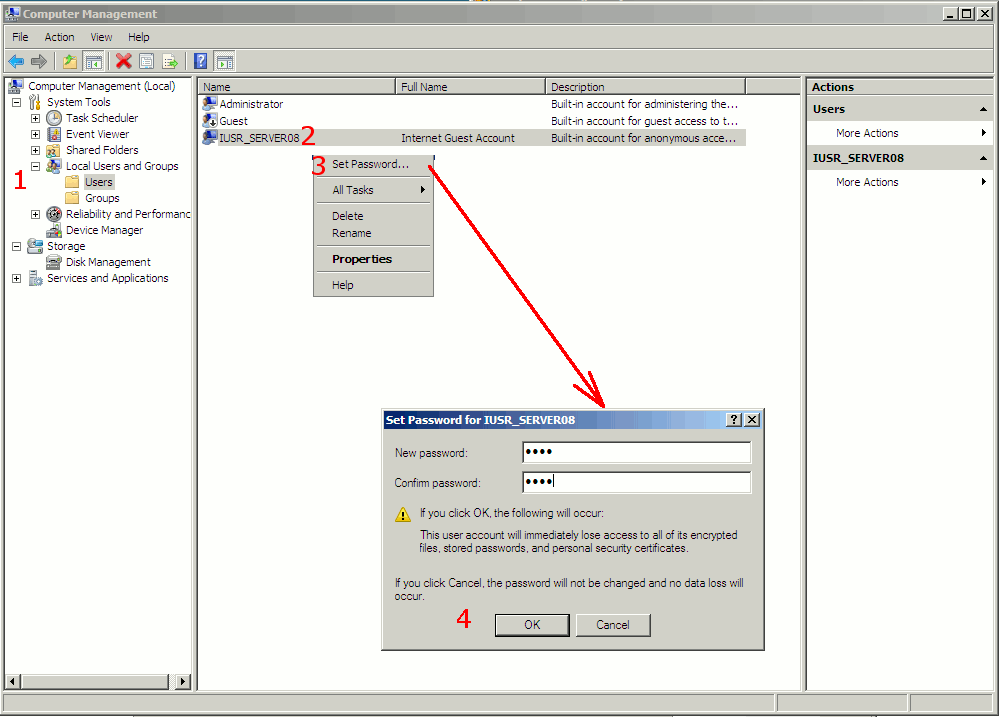
- In order to set up the authentication scheme for IIS 8, at this point, it is a good idea to find or change the password for the IUSR_machine_name account. Go to Administrative Tools | Computer Management | Local Users and Groups. Click on the Users (1) line in the left pane. Right-click on the line (2) for the IUSR_machine_name (Internet Guest Account) line, and select Set Password (3). If you don't already know the password for the Internet Guest Account, set the a new password, and then click OK (4).
- Create folders \inetpub\scripts, \inetpub\scripts\readygo
- From the SST installation, copy the following files to the \inetpub\scripts folder:
- rdgsvtst.exe
- rdgrpt.exe
- rdgextra.exe
- rstrings.txt
- rdgtst3c.js
- rdgrpt.css
- From Administrative Tools, open IIS Manager. In the left sidebar pane,
expand the information for your server. Expand Sites, and Default Web Site
- Select the Default web site. In the right-most panel, click to view virtual directories.
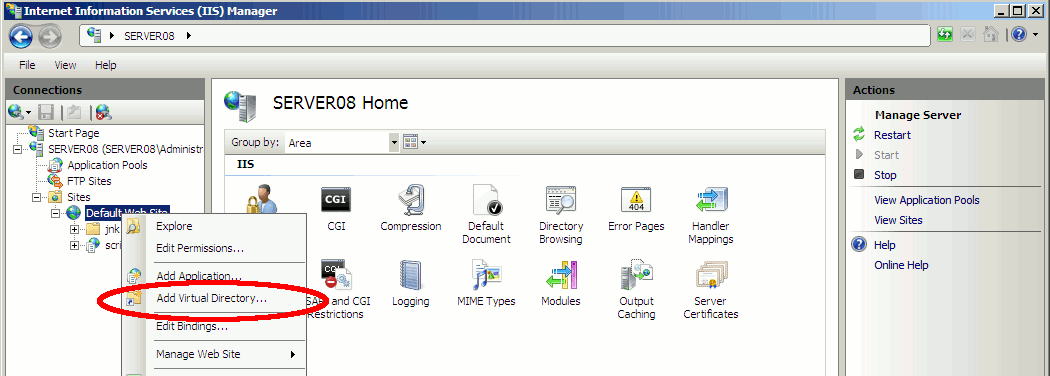
- In the Virtual Directories view, click on the right side to "Add Virtual Directory". Set the Alias to "scripts", set the physical location to "c:\inetpub\scripts"
- Once the Scripts folder has been created, select it. In the right panel, select "Convert to Application"
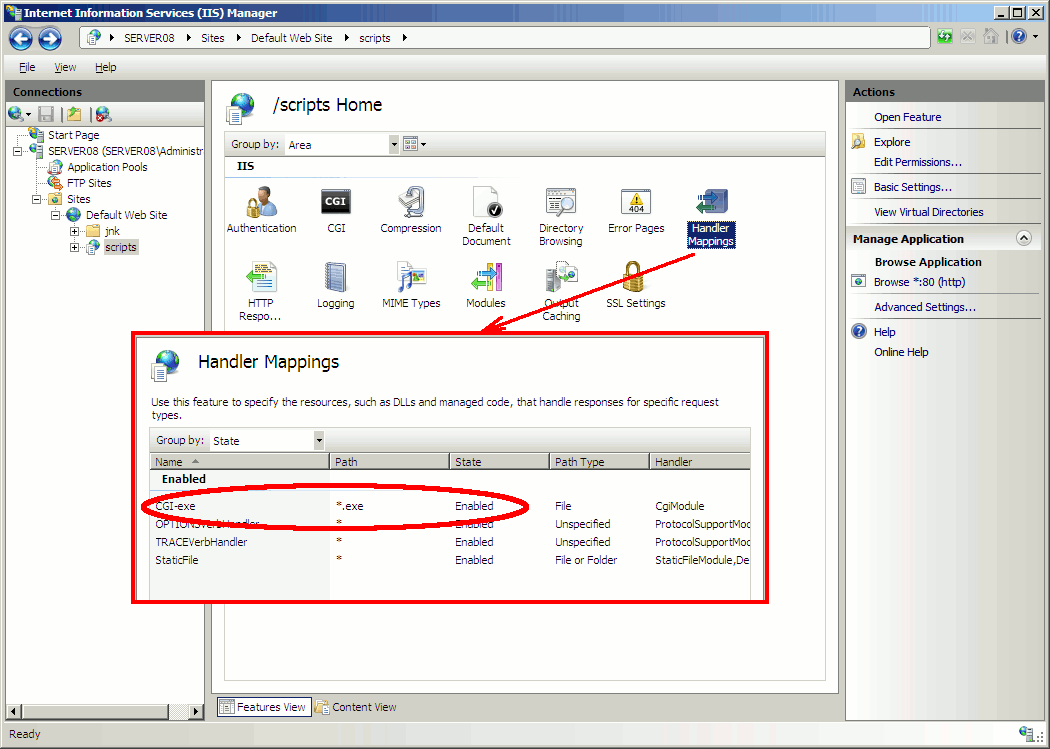
- Click on the "scripts" folder. At the bottom of the window, make sure that the "Features View" is selected. Double-click on "Handler Mapping". This should come up showing that CGI-exe is disabled. Right-click on CGI-exe, and select "Edit Feature Permissions". Click on the "Execute" checkbox, and click OK.
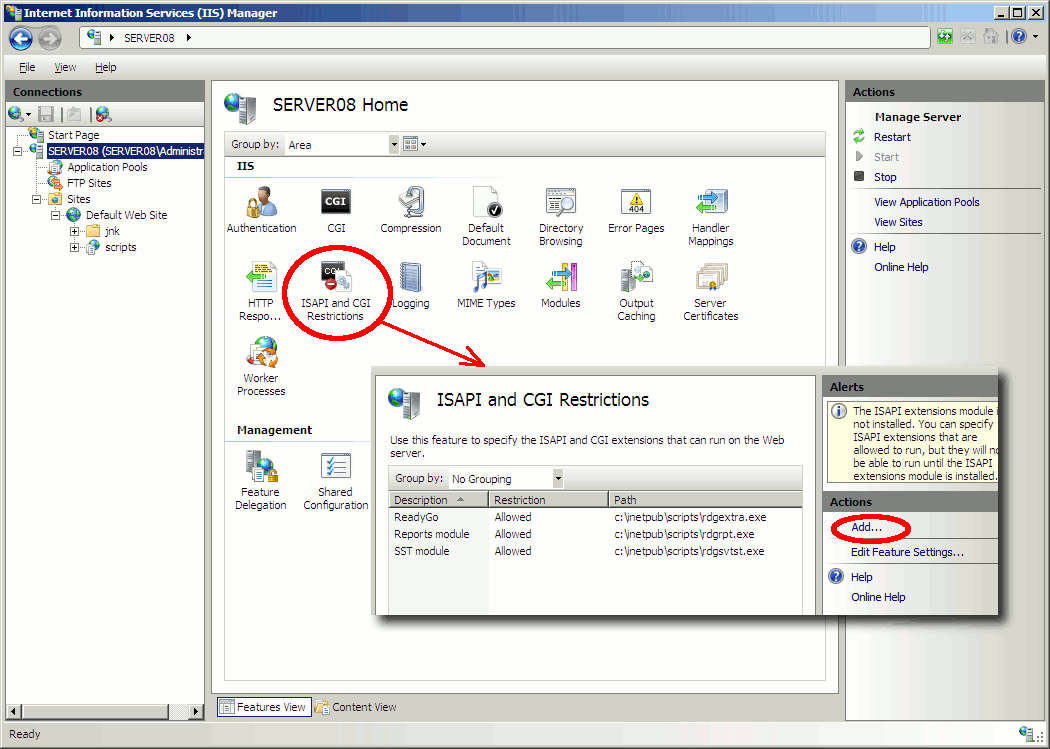
- Click on the Server name. Then click on ISAPI and CGI Restrictions. In the right pane, select Add. For ISAPI or CGI Path, input: c:\inetpub\scripts\rdgrpt.exe. Click on the "Allow extension path to execute". Repeat this step for rdgsvtst.exe and rdgextra.exe.
Open a browser, and make sure you can run- http://localhost/scripts/rdgrpt.exe
- http://localhost/scripts/rdgsvtst.exe
- http://localhost/scripts/rdgextra.exe
- Configure the FTP upload access following directions for Windows Server 2003.
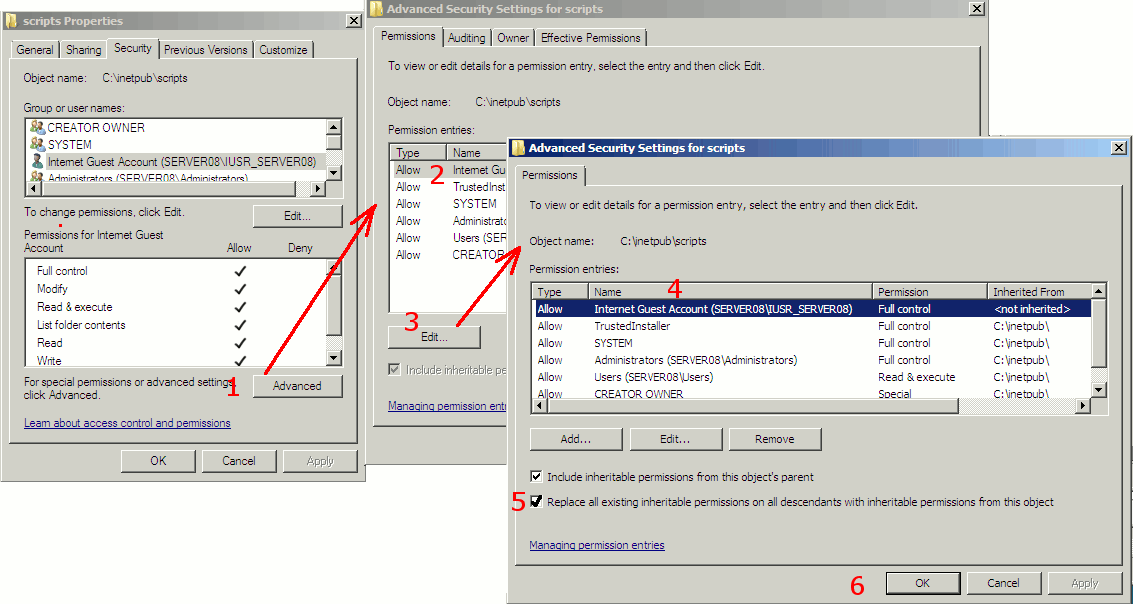
- Go to the physical folder \inetpub\scripts\readygo. Right-click on it (1) and select Properties. Choose the Security tab (2). On the security tab, click the "Edit..." button to modify the
settings. Click on "Add..." (3) to open the list of users that can be added, and click on the Advanced button (4) to open up "Select Users or Groups". Click "Find Now..." (5) to get a list of all usernames on the machine. Find IUSR_server_name (6), and select it. Click OK. This brings you back to the "Select Users or Groups" window. Click OK again. Then give IUSR_server_name full control over the folder.

- At the bottom of the "readygo Properties" dialog click on the "Advanced..." button (1). Click on the IUSR_machine_name (Internet Guest Account) user (2), and then click on the Edit... button (3) in the lower left of the dialog. This opens up the Advanced Security Settings for ready window. Make sure the IUSR_machine_name user is selected (4). Select the checkbox for "Replace all existing inheritalbe permissions on all descendants with inheritable permissions from this object" (5). Click OK (6). The system will ask you if you want to replace the permissions - answer yes. This allows IUSR_machine_name to add files and folders to the scripts\readygo folder. But, you're not done yet...
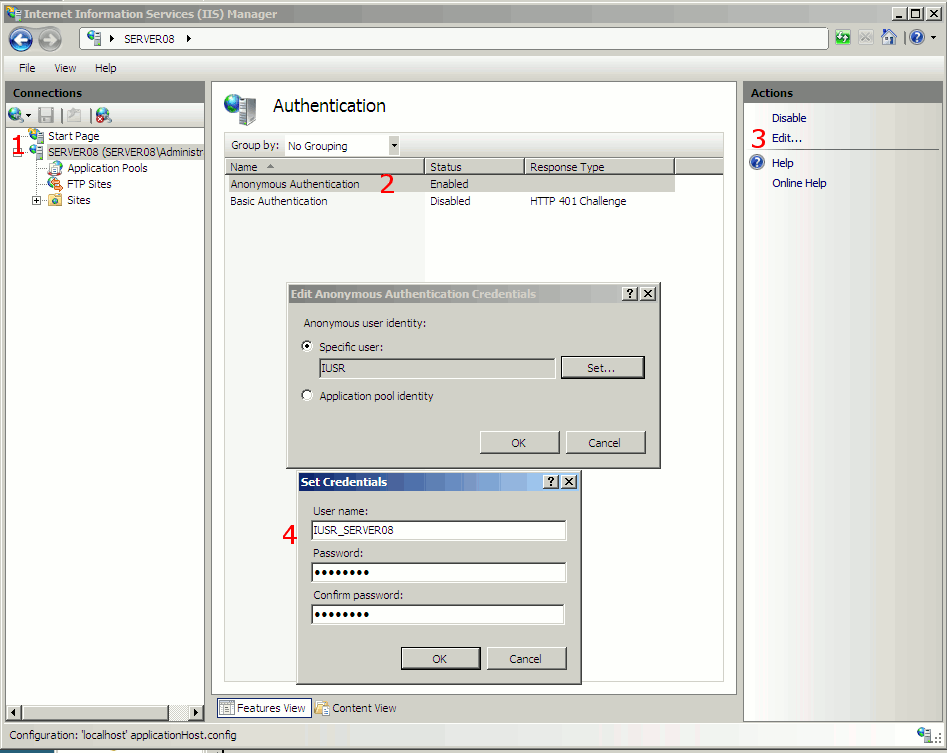
- Return to the IIS control panel. Select the server name to be used (1 in picture). Double-click on the Authentication icon.
 Click on the Anonymous Authentication (2 in picture) line. In the right pane, click on "Edit..." (3), which brings up the "Edit Anonymous Authentication Credentials" dialog. Set the Anonymous User Identity to "Specific User" (4), and set the user as IUSR_machine_name. Input the password that you set earlier. For a more secure server, you can use the application pool entry or rely on basic authentication, but then all users in those groups need to be given full control access over the scripts\readygo folder. (Use of basic authentication is not recommended because then they can access the server through other mechanisms and can view/delete everyone else's results.)