Back
Next
Notifications
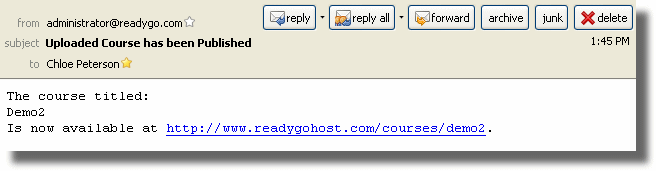
Once you upload the course you will recieve a notification telling you the course is available.
The course upload page will display this message:
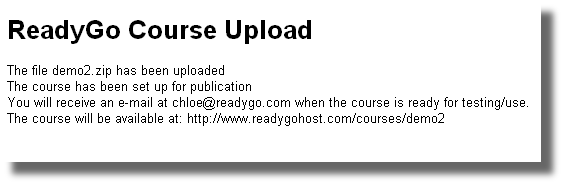
You will be sent an e-mail with the URL of the course.
This is what the course index looks like. As you can see there are two courses, the blue "Demo2" and "Demo3" are hyperlinks to the course.
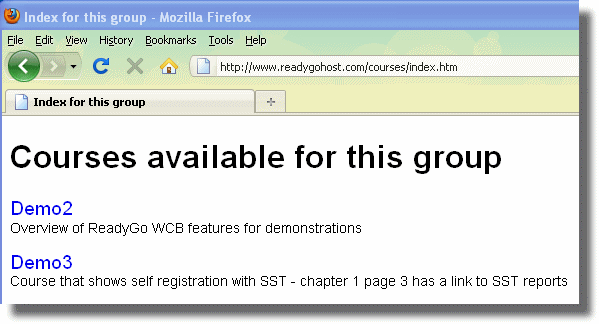
You can change the order the courses appear by modifying the course order on the Index file.
It's True!
You can modify the look of the index page.
Back
Next
Configuring and Installing SST
Course Configuration
1.1
Server-Side Testing Overview
1.2
Setup scenarios
1.3
Student Registration for Server-Side Testing
1.4
Shared User Registration List and Curriculum
1.5
The Test Configuration Dialog
1.6
Feedback
1.7
Test Scoring
1.8
Style Sheets
Serving
2.1
Serving the course
2.2
Where do the Students go?
2.3
Where are the Test Results for Server-Side Testing?
2.4
Server-Side Testing Reports
2.5
Additional Server-based features
2.6
SST and AJAX
2.7
Permitting test re-takes
2.8
Administrative Group Reports
Installation
3.1
Requirements for SST
3.2
Setting up Directories for Courses
3.3
Testing the Executable
3.4
Testing the Web Server
IIS
4.1
Step-by-step checklist
4.2
Setting up the FTP Services
4.3
The Scripts folder
4.4
IIS 6.0
4.5
IIS 7.0/Windows Server 2008
Administrator
5.1
ReadyGo Administrator Overview
5.2
Administrator Page
5.3
Course Creator Upload Page
5.4
Notifications
5.5
Important information
Merchant Connect
6.1
What is ReadyGo Merchant Connect
6.2
ReadyGo Merchant Connect Overview
6.3
Step 1 - Create a course using ReadyGo WCB
6.4
Step 2 - Set up a Google Checkout Account
6.5
Step 3 - Identify Your Course Location
6.6
Step 4 - Selling a Course from Your Web Site
6.7
Your Customer's Experience
6.8
Courses for More then One Student
6.9
Prerequisites
Home
Site Map
ReadyGo WCB V8.0.1